Cookies & Cream Red Velvet Brownies: A Match Made in Dessert Heaven
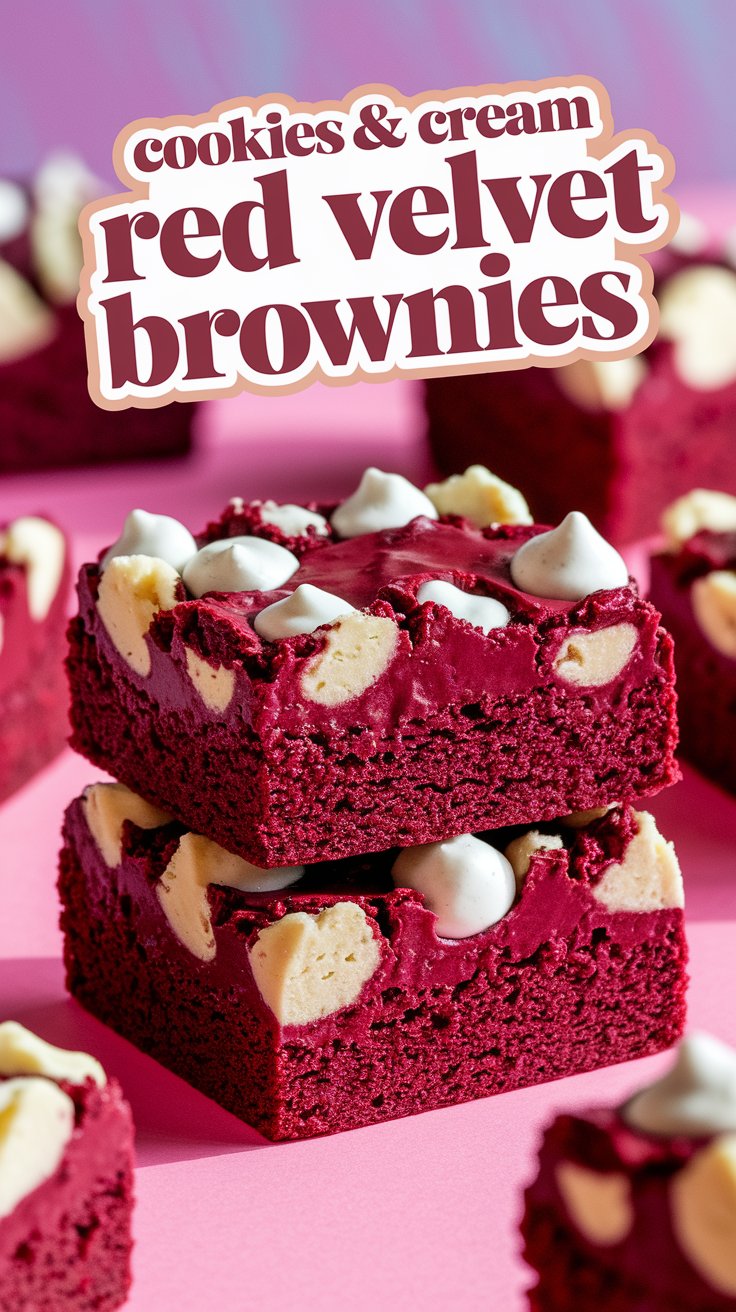
If you’ve ever found yourself torn between the rich velvety allure of red velvet and the nostalgic crunch of cookies and cream I’ve got news for you: you don’t have to choose. These Cookies & Cream Red Velvet Brownies are the ultimate dessert mashup combining the best of both worlds into one decadent treat. Whether you’re a seasoned baker or a newbie in the kitchen this recipe is your ticket to dessert stardom.
Why This Combo Works
Let’s talk about the magic here. Red velvet is known for its subtle cocoa flavor tangy buttermilk undertones and that signature vibrant red hue. It’s luxurious moist and oh-so-satisfying. Now pair that with the creamy crunchy goodness of cookies and cream—think Oreos or any chocolate sandwich cookie—and you’ve got a texture and flavor explosion that’s impossible to resist.
The contrast between the fudgy brownie base and the chunky cookie pieces creates a symphony of textures. Every bite is a little different keeping your taste buds on their toes. Trust me this isn’t your average brownie.
The Recipe: A Labor of Love
Ingredients You’ll Need
- For the Red Velvet Brownies:
- 1 cup unsalted butter melted
- 2 cups granulated sugar
- 4 large eggs
- 1 tsp vanilla extract
- 1/4 cup cocoa powder
- 2 tbsp red food coloring (gel works best for vibrant color)
- 1 1/4 cups all-purpose flour
- 1/4 tsp salt
- For the Cookies & Cream Layer:
- 1 1/2 cups crushed chocolate sandwich cookies (about 12-15 cookies)
- 1 cup white chocolate chips (optional but highly recommended)
Step-by-Step Instructions
- Preheat and Prep: Start by preheating your oven to 350°F (175°C). Line a 9×9-inch baking pan with parchment paper leaving some overhang for easy removal. This little trick will save you so much hassle later—pro tip: lightly grease the pan before adding the parchment paper to keep it in place.
- Make the Brownie Batter: In a large bowl whisk together the melted butter and sugar until well combined. Add the eggs one at a time mixing thoroughly after each addition. Stir in the vanilla extract.In a separate bowl sift together the cocoa powder flour and salt. Gradually add the dry ingredients to the wet mixture stirring until just combined. Be careful not to overmix—this keeps the brownies tender.Now for the pièce de résistance: add the red food coloring. Fold it in until the batter is a deep luscious red. If you’re using gel coloring start with a little and add more until you achieve your desired shade.
- Layer and Bake: Pour half of the brownie batter into the prepared pan spreading it evenly. Sprinkle half of the crushed cookies and white chocolate chips (if using) over the batter. Pour the remaining batter on top then finish with the rest of the cookie crumbs and chocolate chips.Bake for 25-30 minutes or until a toothpick inserted into the center comes out with a few moist crumbs (but not wet batter). Remember brownies continue to cook as they cool so don’t overbake them.
- Cool and Slice: Let the brownies cool completely in the pan before lifting them out using the parchment paper overhang. Cut into squares and prepare for the compliments to roll in.
Pro Tips for Brownie Perfection
- Use High-Quality Cocoa Powder: Since red velvet relies on cocoa for its distinct flavor opt for a good-quality brand. It makes a world of difference.
- Don’t Skip the White Chocolate Chips: They add a creamy sweetness that complements the cookies and cream beautifully.
- Experiment with Cookie Textures: For an extra crunch reserve some larger cookie chunks instead of crushing them all finely.
Serving Suggestions
These brownies are a showstopper on their own but if you want to take them to the next level serve them with a scoop of vanilla ice cream or a drizzle of chocolate ganache. They’re perfect for parties potlucks or just treating yourself after a long day.
Final Thoughts
Baking is all about creativity and joy and these Cookies & Cream Red Velvet Brownies are a testament to that. They’re indulgent visually stunning and guaranteed to impress anyone lucky enough to try them. So preheat that oven grab your ingredients and let’s make some magic happen.
Happy baking! 🧁