10 Creative Back to School Lunch Ideas Your Kids Will Love
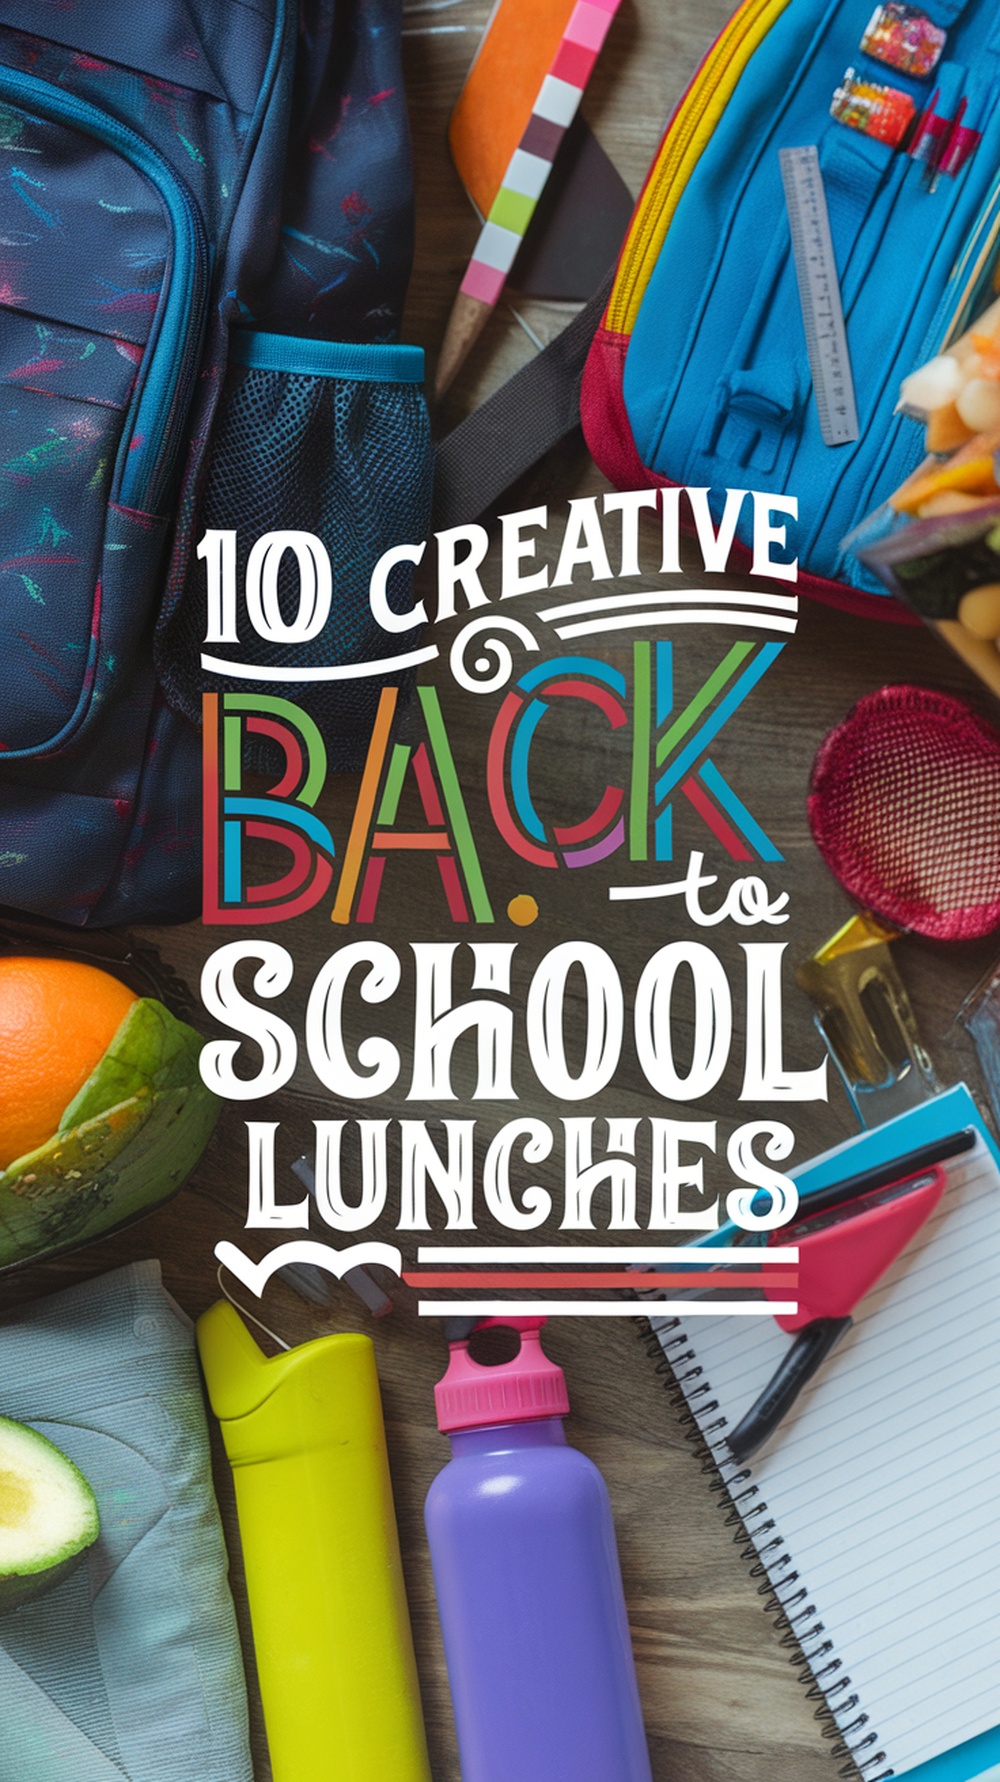
As school season kicks off packing lunch can feel like a chore but it doesn’t have to be! Let’s dive into some fun and tasty lunch ideas that will keep your little ones excited for lunchtime. From quick wraps to colorful salads there’s something here for every palate ensuring they enjoy a satisfying and nutritious meal.
Fruit Kabobs for a Sweet Treat
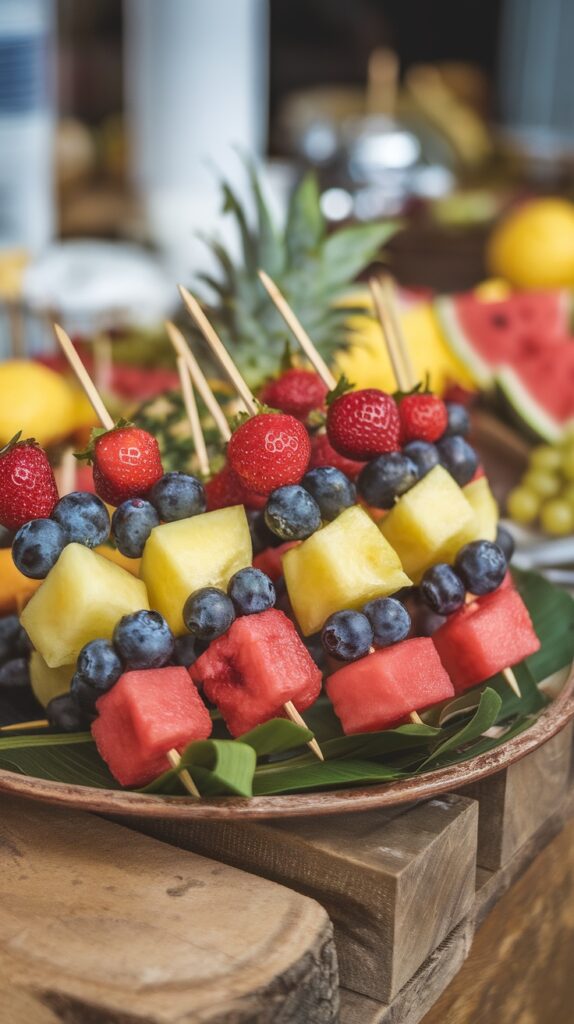
Fruit kabobs are a fun and easy way to enjoy a variety of flavors in one bite. These colorful skewers are not only visually appealing but also bring a refreshing sweetness that kids and adults alike will love. Perfect for lunch boxes snacks or even parties they’re simple to make and offer endless possibilities for customization.
Combining different fruits like strawberries blueberries pineapple and watermelon not only creates a delightful mix of textures but also packs a nutritional punch. These kabobs can also be a great way to introduce new fruits to picky eaters in a fun manner. Below is a quick recipe to whip up these fruity skewers.
Ingredients
- 1 cup strawberries hulled
- 1 cup blueberries
- 1 cup pineapple cubed
- 1 cup watermelon cubed
- Wooden skewers
- Optional: yogurt or chocolate for dipping
Instructions
- Prepare the Fruit: Wash and prepare all the fruits. Cut the pineapple and watermelon into bite-sized cubes.
- Assemble the Kabobs: Take a skewer and thread the fruits onto it in any order you like. You can alternate colors and shapes for a more visually appealing look.
- Serve: Once all the kabobs are assembled serve them fresh. If desired offer yogurt or melted chocolate on the side for dipping.
Cheesy Pasta Salad with Veggies
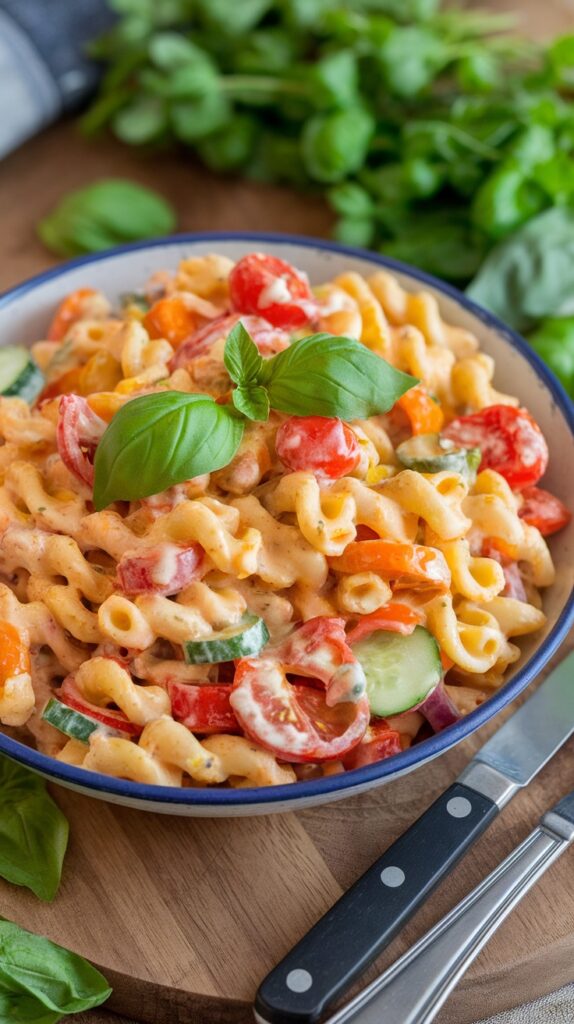
This Cheesy Pasta Salad with Veggies is a delightful way to enjoy lunch. It’s creamy cheesy and packed with colorful vegetables that add crunch and freshness. The flavors blend beautifully making each bite satisfying and tasty. Plus it’s super easy to whip up perfect for busy school mornings or meal prep for the week.
This pasta salad is not only delicious but also versatile. You can mix in your favorite veggies or use whatever you have on hand making it a great way to clear out the fridge. Serve it cold or at room temperature and it’s sure to be a hit among kids and adults alike!
Ingredients
- 2 cups pasta (cooked and cooled)
- 1 cup cherry tomatoes (halved)
- 1/2 cup bell peppers (diced)
- 1/2 cup cucumber (sliced)
- 1/4 cup red onion (finely chopped)
- 1 cup shredded cheese (cheddar or mozzarella)
- 1/2 cup ranch dressing
- 1 tablespoon olive oil
- Salt and pepper to taste
- Fresh basil for garnish
Instructions
- In a large bowl combine the cooked pasta cherry tomatoes bell peppers cucumber and red onion.
- Add the shredded cheese ranch dressing and olive oil to the bowl. Stir everything together until well combined.
- Season with salt and pepper to taste. If desired add more dressing for extra creaminess.
- Chill in the refrigerator for at least 30 minutes before serving to let the flavors meld.
- Garnish with fresh basil before serving. Enjoy your tasty and colorful pasta salad!
Bento Box Fun with Colorful Ingredients
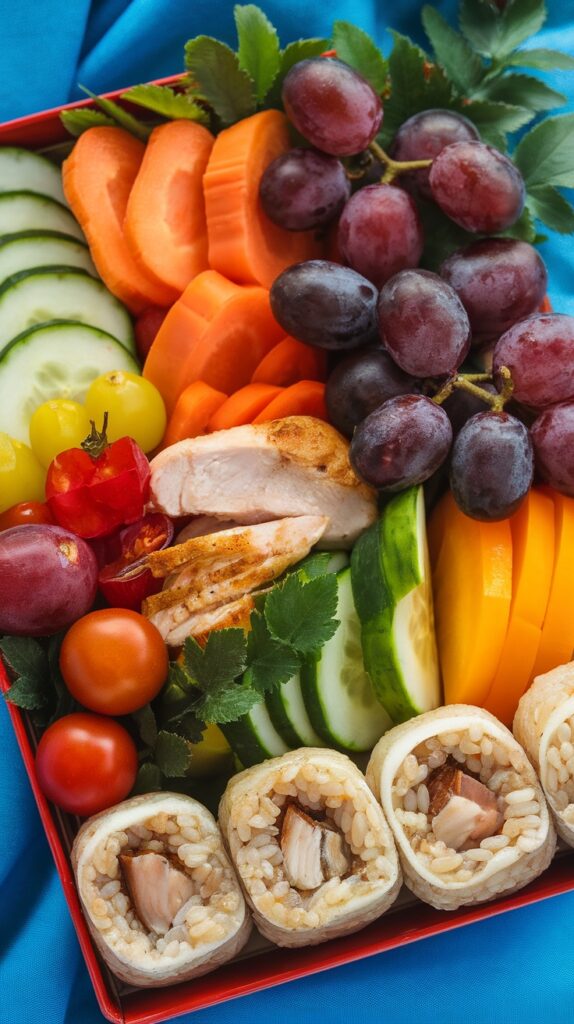
When it comes to packing a fun and nutritious lunch a bento box filled with colorful ingredients is a fantastic choice. This recipe combines vibrant vegetables juicy fruits and flavorful proteins making each lunch a delightful experience. The variety of textures and tastes keeps things interesting ensuring that every bite is enjoyable.
It’s simple to assemble and can be customized to suit different tastes and dietary needs. Plus it’s a great way to sneak in some healthy options without sacrificing flavor. Let’s dive into how to create this colorful lunch that is not only pleasing to the eye but also to the palate!
Ingredients
- 1 cup cooked rice
- 4 oz grilled chicken breast sliced
- 1/2 cucumber sliced
- 1 carrot peeled and cut into sticks
- 1/2 bell pepper sliced
- 1/2 cup grape tomatoes
- 1/2 cup red and green grapes
- 1/4 cup cilantro leaves
- 1/2 avocado sliced
- 3-4 sushi rolls (made with rice chicken and vegetables)
Instructions
- Prepare the Base: Start by placing the cooked rice in the bento box as a base. You can use sushi rice or any other variety you prefer.
- Cook the Chicken: Grill or pan-sear the chicken breast until fully cooked. Allow it to cool then slice it into bite-sized pieces.
- Arrange the Veggies: Take the cucumber carrot and bell pepper slices and arrange them in sections around the rice. This adds color and crunch.
- Add the Fruits: Fill in the gaps with grape tomatoes and grapes. The sweetness of the fruits balances the savory elements.
- Top it Off: Finally add slices of avocado and sprinkle cilantro over the top for a fresh touch. Don’t forget to include the sushi rolls for an extra treat!
DIY Wraps with Fresh Fillings
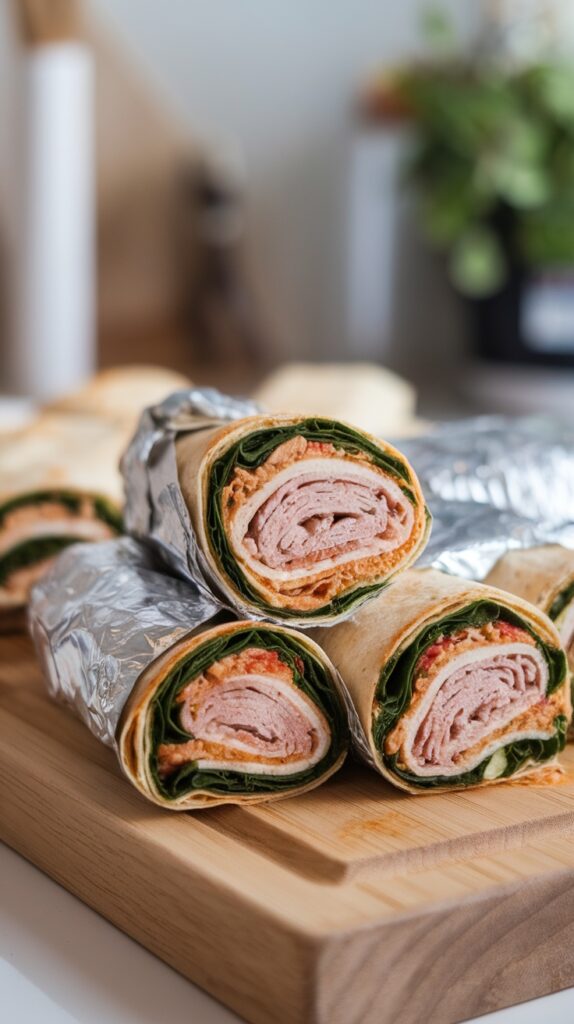
DIY wraps are a fun and flexible option for back-to-school lunches. With layers of fresh ingredients wrapped in a soft tortilla these wraps are not only tasty but also easy to prepare. Kids can enjoy a healthy and satisfying meal that they can hold in their hands.
These wraps can be filled with an array of ingredients from lean proteins to crunchy veggies. The combination of flavors and textures makes each bite enjoyable. Plus they can be made in advance and stored in the fridge for a quick grab-and-go meal!
Ingredients
- 4 large tortillas
- 1 cup fresh spinach leaves
- 1 cup sliced deli turkey or chicken
- 1/2 cup roasted red peppers sliced
- 1/4 cup cream cheese softened
- 1 tablespoon pesto
- Salt and pepper to taste
Instructions
- Lay out the tortillas on a clean surface.
- Spread a layer of cream cheese mixed with pesto evenly over each tortilla.
- On each tortilla place a handful of spinach followed by slices of turkey and roasted red peppers.
- Sprinkle with salt and pepper to taste.
- Carefully roll each tortilla tightly starting from one edge. Slice into pinwheels or halves as desired.
- Wrap in foil or parchment paper for easy transport and enjoy!
Hearty Soup in a Thermos
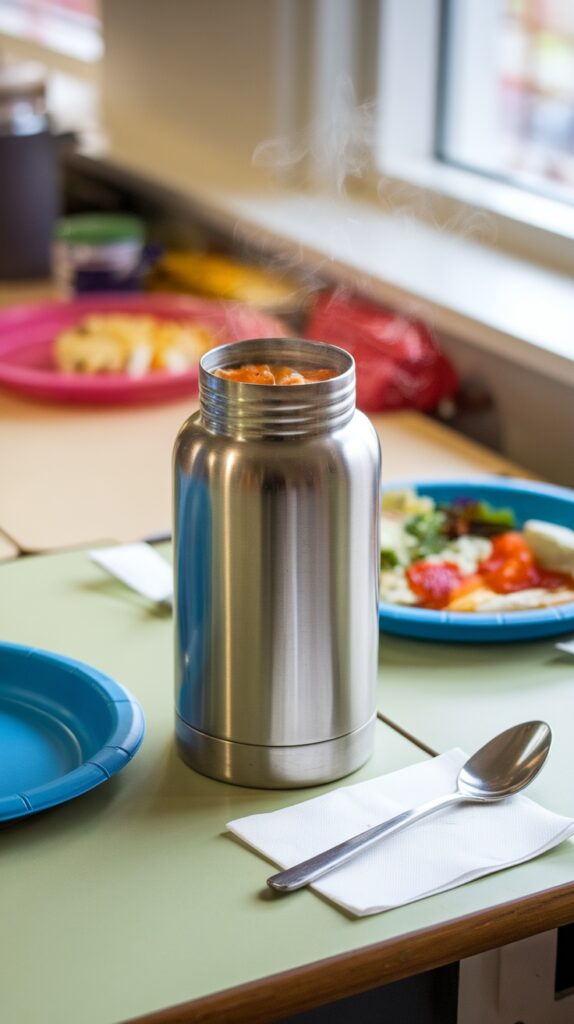
Sending your kids back to school with a warm hearty soup is a delightful way to ensure they have a nourishing meal during the day. This recipe is not only packed with flavor but is also incredibly simple to prepare. With a combination of vegetables protein and comforting broth it’s a lunch that will keep them satisfied and energized for their afternoon classes.
Making soup is a versatile process—feel free to customize it based on what your family enjoys or what’s in season. Plus it’s easy to make a big batch ahead of time so you can portion it out for the week. Just heat it up in the morning fill the thermos and you’re good to go!
Ingredients
- 2 tablespoons olive oil
- 1 onion diced
- 2 carrots chopped
- 2 celery stalks chopped
- 3 cloves garlic minced
- 1 teaspoon dried thyme
- 1 teaspoon dried oregano
- 4 cups vegetable or chicken broth
- 1 can (14.5 oz) diced tomatoes
- 1 cup green beans cut into pieces
- 1 cup cooked pasta (optional)
- Salt and pepper to taste
- Fresh parsley chopped (for garnish)
Instructions
- Heat the olive oil in a large pot over medium heat. Add the diced onion carrots and celery. Cook for about 5-7 minutes or until the vegetables are softened.
- Add the minced garlic thyme and oregano. Stir for about 1 minute until fragrant.
- Pour in the broth and diced tomatoes. Bring the mixture to a boil.
- Add the green beans and pasta (if using). Reduce heat and let it simmer for 15-20 minutes or until the vegetables are tender.
- Season with salt and pepper to taste. Garnish with fresh parsley before serving.
- Transfer the soup into a thermos to keep warm until lunchtime.
Vegetable Sushi Rolls for a Twist
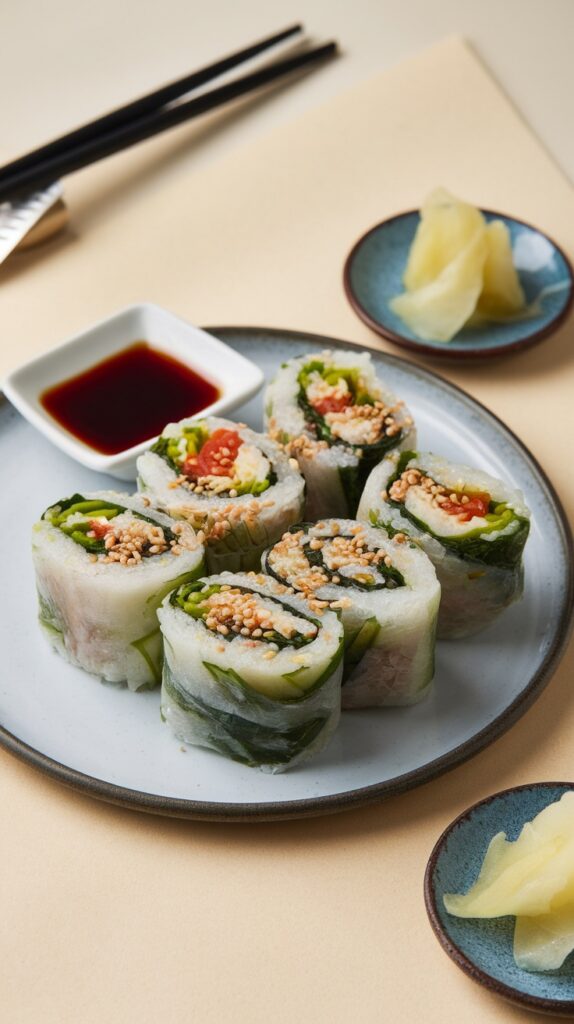
Vegetable sushi rolls offer a delightful twist on traditional sushi making them a fun and healthy lunch option for school. With fresh veggies wrapped in rice and rice paper these rolls are not only colorful but also bursting with flavor. They provide a crunchy texture and a refreshing taste perfect for satisfying midday cravings.
Making vegetable sushi rolls is simple and can be a great way to involve kids in the kitchen. You can customize the fillings to their liking ensuring they enjoy every bite. Plus they’re portable and can be served with soy sauce or a tangy dipping sauce for added flavor. Here’s a quick recipe to get you started!
Ingredients
- 1 cup sushi rice
- 1 1/4 cups water
- 4 rice paper sheets
- 1/2 cucumber julienned
- 1 carrot julienned
- 1 avocado sliced
- 1 bell pepper sliced
- 1 cup spinach leaves
- 2 tablespoons sesame seeds
- Soy sauce for dipping
Instructions
- Prepare the Sushi Rice: Rinse the sushi rice under cold water until the water runs clear. Combine the rice and water in a pot. Bring to a boil reduce to low heat cover and simmer for about 20 minutes. Remove from heat and let it sit for 10 minutes covered.
- Assemble the Rolls: Fill a shallow dish with warm water. Dip a rice paper sheet in the water for about 10-15 seconds until it becomes pliable. Lay it flat on a clean surface.
- Add the Fillings: Place a small amount of sushi rice in the center of the rice paper followed by the julienned cucumber carrot avocado bell pepper and spinach leaves. Sprinkle some sesame seeds on top.
- Roll It Up: Fold the sides of the rice paper over the filling then roll it tightly from the bottom to the top ensuring the fillings are secure. Repeat with the remaining rice paper sheets.
- Slice and Serve: Cut each roll into bite-sized pieces and serve with soy sauce for dipping. Enjoy your fresh vegetable sushi rolls!
Creative Sandwich Alternatives
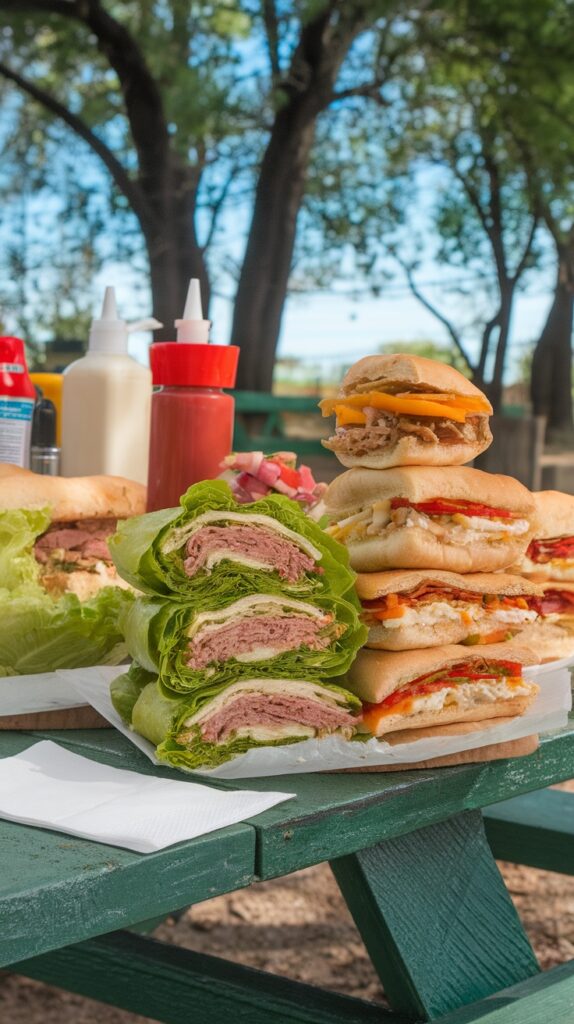
Switching up lunchtime sandwiches can be a fun way to keep things exciting. One tasty alternative is the lettuce wrap sandwich. It’s not only fresh but also light making it a perfect option for a midday meal. The crunch of the lettuce combined with savory fillings creates a satisfying bite that kids and adults alike will enjoy.
This recipe is simple to make and can be customized with your favorite deli meats cheeses and veggies. Just roll it all up in crisp lettuce leaves and you’ve got a flavorful lunch that’s both nutritious and delicious!
Ingredients
- 4 large romaine or iceberg lettuce leaves
- 8 slices deli meat of your choice (turkey ham or roast beef)
- 4 slices cheese (cheddar Swiss or provolone)
- 1/2 cup sliced bell peppers
- 1/4 cup shredded carrots
- Optional: mustard or mayonnaise
Instructions
- Prep the Lettuce: Carefully wash and dry the lettuce leaves. Choose the largest and most intact leaves for wrapping.
- Layer the Ingredients: On each lettuce leaf layer 2 slices of your chosen deli meat followed by 1 slice of cheese. Add sliced bell peppers and shredded carrots on top.
- Add Condiments: If desired spread a thin layer of mustard or mayonnaise over the ingredients for extra flavor.
- Wrap It Up: Starting from one end roll the lettuce leaf tightly around the fillings. Secure with a toothpick if needed.
- Serve: Cut in half for easy handling and enjoy your tasty lettuce wrap sandwiches!
Protein-Packed Quinoa Salad
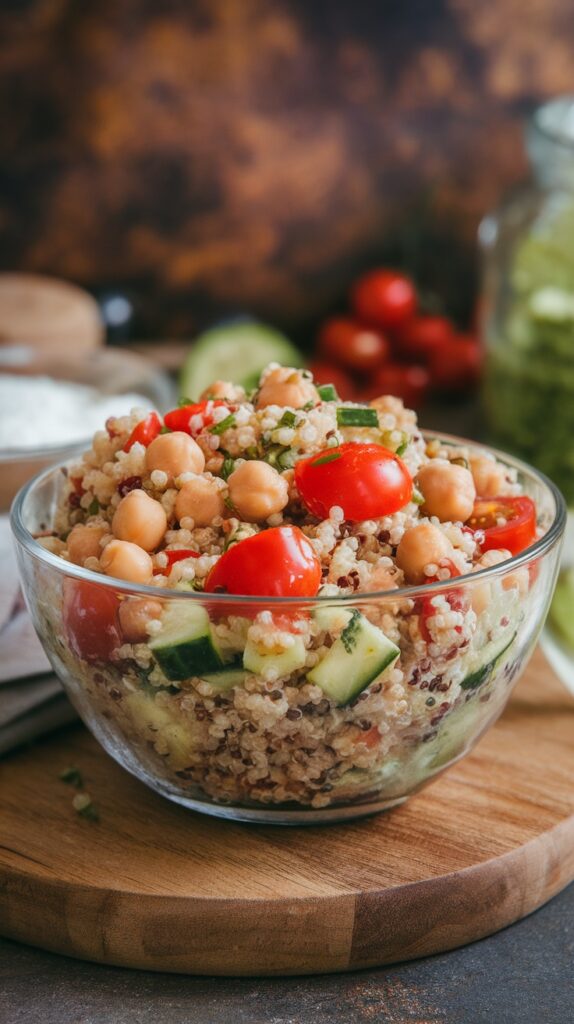
This protein-packed quinoa salad is a fun and tasty way to fuel your day. It combines fluffy quinoa with crunchy vegetables like cucumbers and tomatoes along with chickpeas for an extra boost of protein. The flavors are fresh and vibrant making it a satisfying lunch option that’s also super simple to whip up.
Perfect for busy school days this salad can be made in advance and stored in the fridge. Just grab a portion before heading out and you’ll have a nutritious meal ready to go. Plus it’s versatile—feel free to add your favorite herbs or dressings to suit your taste!
Ingredients
- 1 cup quinoa
- 2 cups water or vegetable broth
- 1 can chickpeas drained and rinsed
- 1 cup cherry tomatoes halved
- 1 cucumber diced
- 1/4 cup red onion finely chopped
- 1/4 cup fresh parsley chopped
- 1/4 cup olive oil
- 2 tablespoons lemon juice
- Salt and pepper to taste
Instructions
- Rinse the quinoa under cold water. In a medium saucepan combine quinoa and water or broth. Bring to a boil then reduce heat cover and simmer for about 15 minutes until quinoa is fluffy and liquid is absorbed. Let it cool.
- In a large bowl combine cooked quinoa chickpeas cherry tomatoes cucumber red onion and parsley.
- In a small bowl whisk together olive oil lemon juice salt and pepper. Pour the dressing over the salad and toss to combine.
- Chill in the refrigerator for about 30 minutes before serving allowing the flavors to meld.
Mini Quiches for a Savory Snack

Mini quiches are a delightful way to add some variety to your back-to-school lunch ideas. These bite-sized treats are not only tasty but also easy to customize with your favorite ingredients. They can be packed with vegetables meats or cheeses making them a savory snack that keeps lunchtime interesting.
These little quiches are simple to make allowing you to whip them up quickly and store them for the week. Perfect for lunchboxes or snacks after school mini quiches can be enjoyed warm or cold making them a versatile option. Plus they are a great way to sneak in some veggies ensuring a nutritious meal!
Ingredients
- 1 package of pre-made pastry dough
- 6 large eggs
- 1 cup milk
- 1 cup shredded cheese (cheddar mozzarella or your choice)
- 1 cup chopped vegetables (spinach bell peppers mushrooms etc.)
- 1/2 cup diced cooked ham or bacon (optional)
- Salt and pepper to taste
- Fresh herbs (thyme or parsley) for garnish
Instructions
- Preheat your oven to 375°F (190°C) and grease a muffin tin.
- Roll out the pastry dough and cut it into rounds to fit the muffin tin cups. Place the dough in each cup pressing it down gently.
- In a mixing bowl whisk together the eggs milk salt and pepper. Stir in the shredded cheese chopped vegetables and ham or bacon if using.
- Pour the egg mixture evenly into each pastry-lined cup filling them about 3/4 full.
- Bake for 20-25 minutes or until the egg is set and the tops are lightly golden.
- Let them cool slightly before removing from the muffin tin. Garnish with fresh herbs and enjoy!
Nut-Free Energy Balls for a Boost
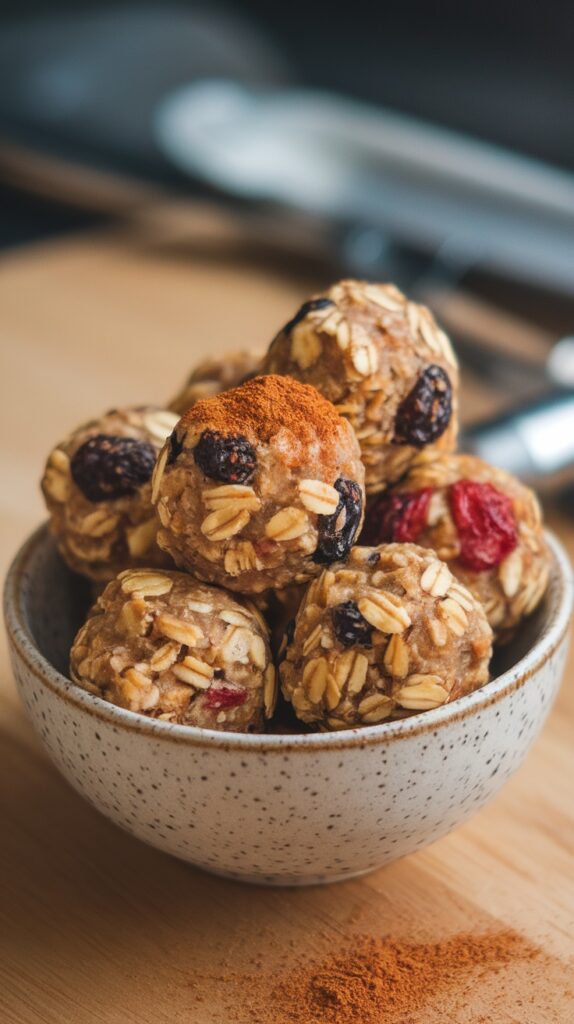
Nut-free energy balls are a delightful snack that provide a tasty boost for both kids and adults. These little bites are packed with wholesome ingredients offering a burst of energy without any nuts. They’re chewy with a hint of sweetness and a touch of spice making them a perfect treat for busy school days.
Making these energy balls is super simple—just mix everything together roll them into balls and you’re all set! They’re great for lunchboxes or an after-school snack providing a healthy alternative that’s both satisfying and delicious.
Ingredients
- 1 cup rolled oats
- 1/2 cup sunflower seed butter
- 1/3 cup honey or maple syrup
- 1/2 cup dried fruit (like cranberries or raisins)
- 1/4 cup mini chocolate chips (optional)
- 1/2 teaspoon cinnamon
- 1 teaspoon vanilla extract
Instructions
- In a large bowl combine rolled oats sunflower seed butter honey dried fruit chocolate chips (if using) cinnamon and vanilla extract.
- Mix all the ingredients until well combined. If the mixture is too sticky add a bit more oats.
- Using your hands roll the mixture into small balls about 1 inch in diameter.
- Place the energy balls on a baking sheet lined with parchment paper and refrigerate for about 30 minutes to firm up.
- Store in an airtight container in the fridge for up to a week and enjoy them as a quick snack or a lunchbox treat!