How to Make Lobster Tail Pastry: A Decadent Treat Worth the Effort
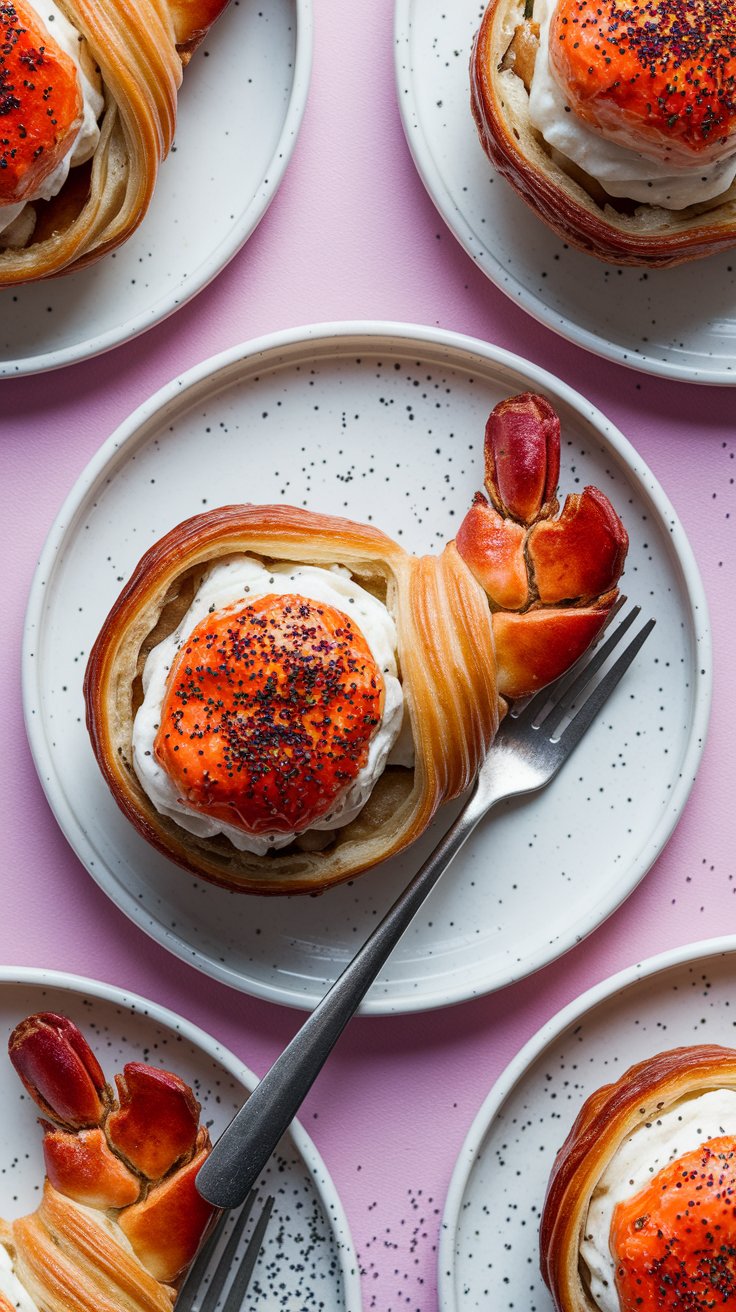
If you’ve ever wandered into a fancy bakery and spotted a golden flaky pastry shaped like a lobster tail you’ve likely encountered one of the most luxurious desserts out there: the lobster tail pastry (or sfogliatella riccia in Italian). This delicate shell-shaped dessert is filled with a creamy sweet ricotta filling and boasts layers upon layers of crispy buttery pastry. It’s a showstopper and while it may seem intimidating to make at home I’m here to guide you through it step by step. Trust me the effort is worth it.
What is a Lobster Tail Pastry?
Before we dive into the recipe let’s talk about what makes this pastry so special. Originating from Naples Italy the lobster tail pastry is a labor of love. Its signature look comes from the layered shingled dough that puffs up during baking creating a texture that’s both crispy and airy. The filling is traditionally a mix of ricotta cheese sugar and citrus zest though some variations include pastry cream or even a hint of cinnamon.
The name “lobster tail” comes from its shape—when baked the pastry fans out at one end resembling the tail of a lobster. It’s a dessert that’s as beautiful as it is delicious.
Ingredients You’ll Need
For the Dough:
- 2 ½ cups (300g) all-purpose flour
- 1 tsp salt
- 1 cup (240ml) water
- ½ cup (115g) unsalted butter softened
- ½ cup (100g) lard or additional butter (for layering)
For the Filling:
- 1 ½ cups (375g) ricotta cheese
- ½ cup (100g) granulated sugar
- 1 tsp vanilla extract
- Zest of 1 orange or lemon
- 1 egg yolk
- ¼ cup (40g) semolina flour (optional for thickening)
For Assembly:
- 1 egg (for egg wash)
- Powdered sugar (for dusting)
Step-by-Step Instructions
1. Make the Dough
Start by combining the flour and salt in a large mixing bowl. Gradually add the water mixing until a rough dough forms. Knead the dough on a floured surface for about 10 minutes until it becomes smooth and elastic. Wrap it in plastic wrap and let it rest for 30 minutes.
Pro Tip: Don’t skip the resting time! This allows the gluten to relax making the dough easier to roll out later.
2. Roll and Layer the Dough
After resting roll the dough out into a large rectangle (about 1/8-inch thick). Spread a thin layer of softened butter over the entire surface. Now here’s the fun part: starting from one end roll the dough up tightly like a jelly roll. Wrap it in plastic wrap and chill in the fridge for 1 hour.
Once chilled slice the roll into 1-inch pieces. Take each piece and roll it out again into a thin rectangle. Spread a thin layer of lard or butter over the surface then roll it up tightly again. Repeat this process 2-3 times to create those signature layers.
Pro Tip: The key to achieving those flaky layers is patience. Don’t rush the rolling and chilling process—it’s what gives the pastry its incredible texture.
3. Prepare the Filling
While the dough is chilling mix the ricotta sugar vanilla extract citrus zest and egg yolk in a bowl. If the mixture seems too runny add a bit of semolina flour to thicken it. Set aside.
4. Shape the Pastries
Take one of your rolled dough pieces and flatten it slightly with your hands. Using a rolling pin roll it out into an oval shape. Place a spoonful of filling in the center then fold the dough over to encase the filling shaping it into a lobster tail by pinching one end and fanning out the other.
Pro Tip: If the dough starts to tear don’t panic! Just patch it up with a little extra dough—it’ll bake up beautifully regardless.
5. Bake to Perfection
Preheat your oven to 375°F (190°C). Brush each pastry with egg wash to give it that golden shine. Bake for 20-25 minutes or until the pastries are puffed and golden brown.
Serving Your Lobster Tail Pastries
Once out of the oven let the pastries cool slightly before dusting them with powdered sugar. Serve them warm with a cup of espresso or a glass of dessert for the ultimate indulgence.
Final Thoughts
Making lobster tail pastries at home is no small feat—it requires time patience and a little bit of elbow grease. But when you bite into that first flaky creamy bite you’ll understand why this dessert is so beloved. It’s a testament to the magic of baking where simple ingredients transform into something extraordinary.
So roll up your sleeves put on some good music and get ready to impress yourself (and anyone lucky enough to taste your creations). Happy baking!
Pro Tip: If you’re feeling adventurous try experimenting with different fillings like chocolate-hazelnut spread or a spiced pumpkin cream. The possibilities are endless!

