10 Delicious Memorial Day Desserts to Celebrate
Memorial Day is all about honoring those who have served but it’s also a time to gather with family and friends for outdoor fun. What better way to sweeten your get-together than with some delightful desserts? From festive red white and blue treats to simple summer favorites these dessert ideas will add a fun flair to your holiday celebrations while keeping your taste buds happy.
Patriotic Berry Pavlova
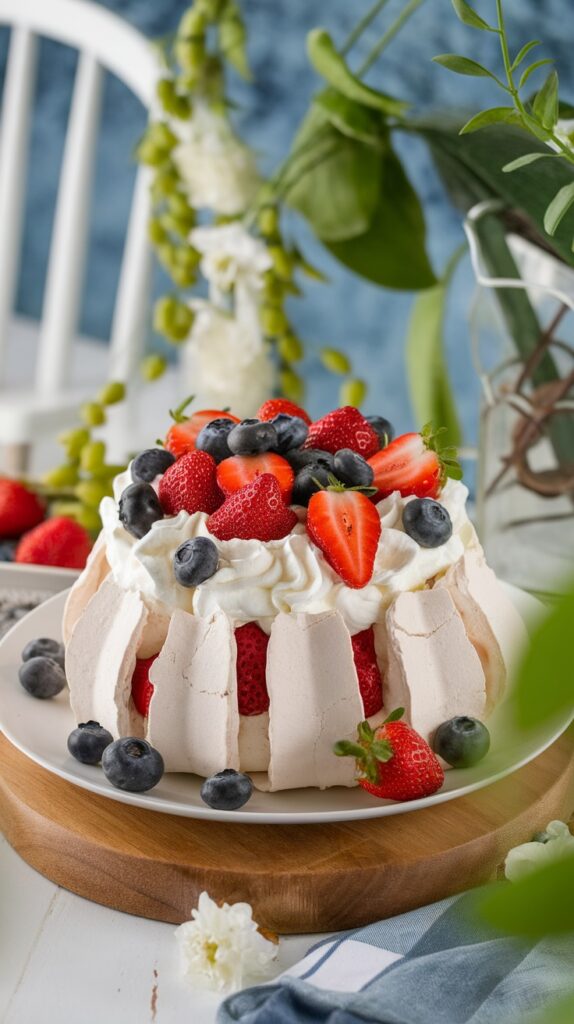
Patriotic Berry Pavlova is a delightful dessert that captures the essence of summer celebrations. With its light and airy meringue base topped with fluffy whipped cream and fresh berries it’s a treat that feels festive and refreshing. The contrasting textures of the crispy meringue and the soft cream create a delicious balance that makes each bite a pleasure.
This recipe is simple enough for bakers of all levels. It not only looks impressive but also allows you to showcase ripe strawberries and blueberries making it a perfect dessert for Memorial Day gatherings.
Ingredients
- 4 large egg whites
- 1 cup granulated sugar
- 1 teaspoon cornstarch
- 1 teaspoon white vinegar
- 1 cup heavy whipping cream
- 2 tablespoons powdered sugar
- 1 teaspoon vanilla extract
- 2 cups mixed fresh berries (strawberries and blueberries)
Instructions
- Preheat your oven to 275°F (135°C) and line a baking sheet with parchment paper.
- In a large mixing bowl beat the egg whites until soft peaks form. Gradually add granulated sugar continuing to beat until stiff peaks form.
- Gently fold in cornstarch and vinegar until well combined. Spread the meringue mixture into a circle on the prepared baking sheet creating a slight dip in the center.
- Bake for about 1 hour then turn off the oven and let the pavlova cool completely inside.
- Once cooled whip the cream with powdered sugar and vanilla until soft peaks form. Spread the whipped cream over the pavlova.
- Top with mixed fresh berries. Slice and serve immediately for a delightful summer dessert.
Watermelon Cake
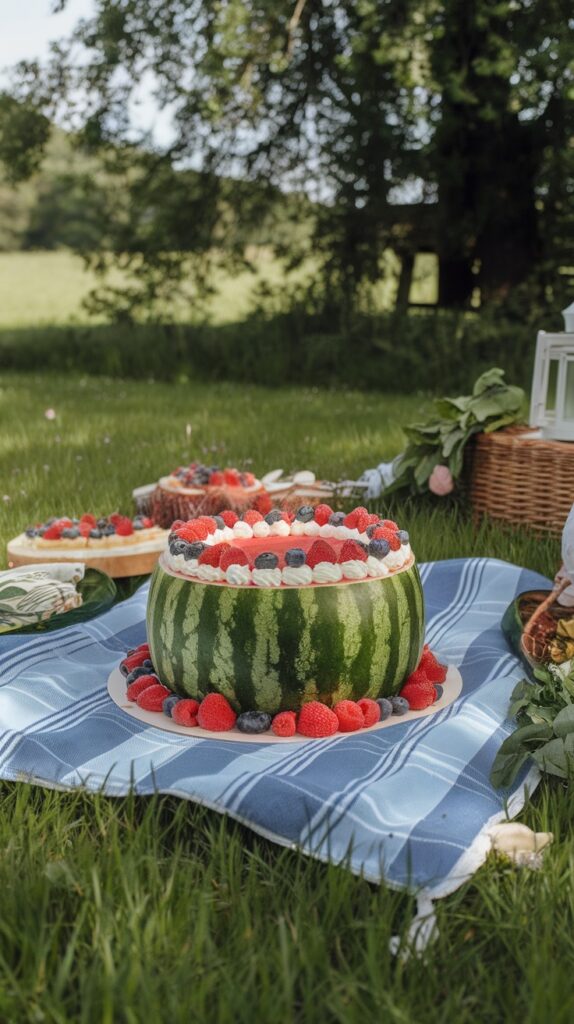
Watermelon cake is a refreshing twist on traditional desserts perfect for Memorial Day gatherings. This vibrant creation combines fresh watermelon with a light and creamy topping making it a delightful treat on a warm day.
The flavors are simple yet satisfying with sweetness from the watermelon and a hint of vanilla from the topping. Plus it’s easy to make so you can spend more time with friends and family rather than in the kitchen. Enjoy every bite of this fun healthy dessert!
Ingredients
- 1 large seedless watermelon
- 1 cup heavy whipping cream
- 1/4 cup powdered sugar
- 1 teaspoon vanilla extract
- 1 cup mixed berries (strawberries blueberries raspberries)
Instructions
- Prepare the Watermelon: Slice the watermelon in half lengthwise. Scoop out the flesh from each half keeping the rind intact to create bowls.
- Make the Topping: In a mixing bowl whip the heavy cream until soft peaks form. Gradually add powdered sugar and vanilla extract continuing to whip until well combined.
- Assemble the Cake: Fill the hollowed watermelon halves with the whipped cream then top with a generous amount of mixed berries.
- Chill and Serve: Place the watermelon halves in the refrigerator for about 30 minutes before slicing into wedges and serving chilled.
Berry Swirl Cheesecake Bars
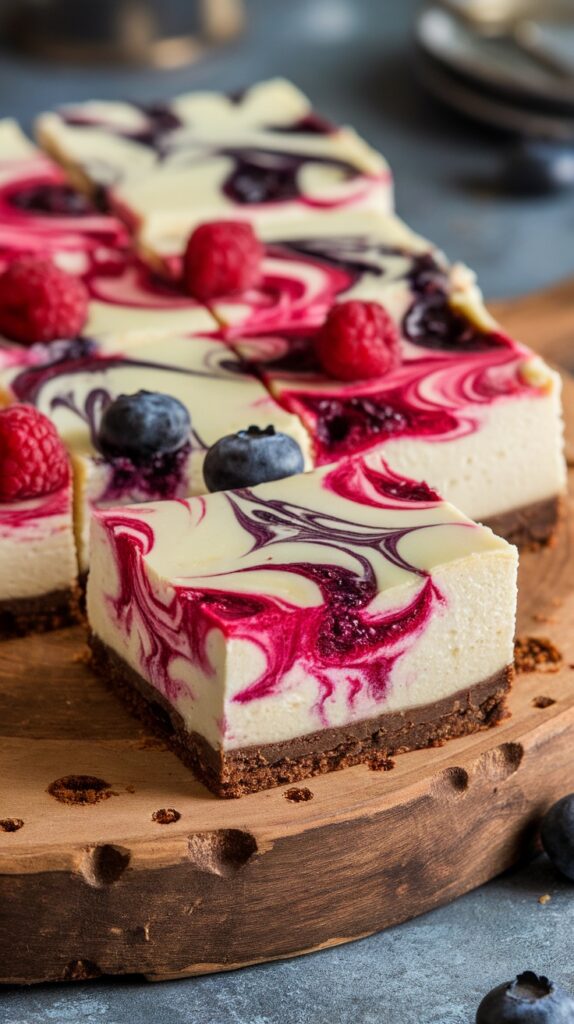
Berry Swirl Cheesecake Bars are a delightful treat combining creamy cheesecake with a vibrant berry swirl. The rich smooth filling is perfectly balanced by a buttery crust making each bite a delicious blend of flavors. These bars not only look beautiful but also taste fresh and fruity making them a fantastic choice for Memorial Day gatherings.
Plus they’re easy to make! With minimal prep time and simple ingredients you can whip these up to impress your family and friends. They’re perfect for sharing and a great way to showcase seasonal berries!
Ingredients
- 1 ½ cups graham cracker crumbs
- ½ cup unsalted butter melted
- 2 cups cream cheese softened
- 1 cup granulated sugar
- 2 large eggs
- 1 teaspoon vanilla extract
- 1 cup mixed berries (raspberries and blueberries)
- 2 tablespoons sugar (for berry mixture)
Instructions
- Preheat your oven to 325°F (160°C). Grease a 9×9-inch baking pan.
- For the crust mix graham cracker crumbs with melted butter until combined. Press the mixture firmly into the bottom of the prepared pan.
- In a large bowl beat together the cream cheese and granulated sugar until smooth. Add in eggs one at a time followed by the vanilla extract mixing well.
- In a small saucepan combine the mixed berries and 2 tablespoons of sugar. Cook over medium heat until the berries have softened about 5 minutes. Mash them slightly to create a thick sauce.
- Pour the cheesecake mixture over the crust and then drop spoonfuls of the berry mixture on top. Use a knife to swirl the berry sauce into the cheesecake batter for a marbled effect.
- Bake for 30-35 minutes or until the edges are set but the center still has a slight jiggle. Let it cool to room temperature then refrigerate for at least 4 hours before slicing into bars.
S’mores Dip with Patriotic Twist
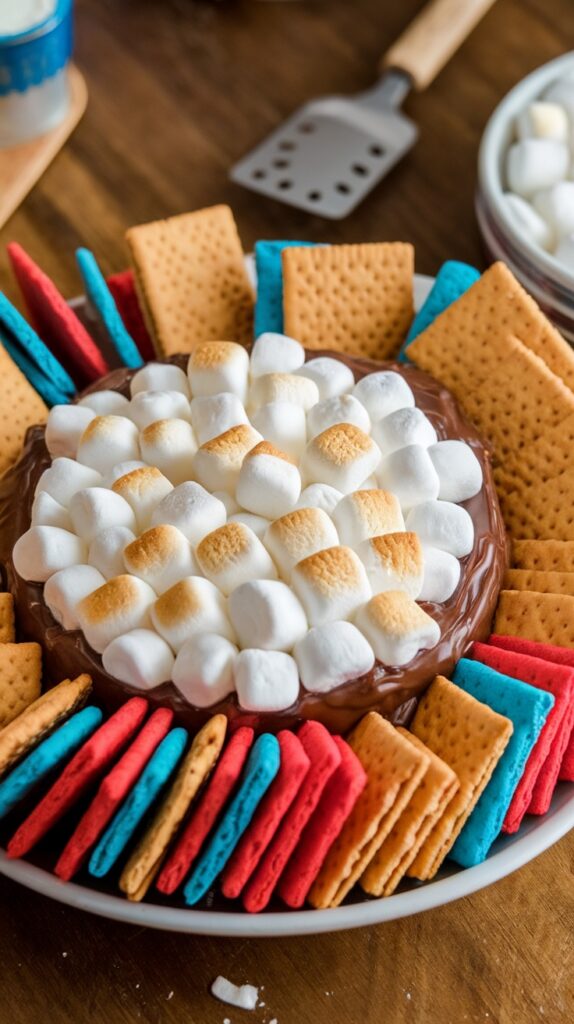
This S’mores Dip with a patriotic twist is a delightful treat that brings a fun twist to a classic favorite. With its gooey chocolate base topped with toasted marshmallows it’s a sweet and satisfying dessert that everyone will love. Plus it’s incredibly simple to make requiring just a few ingredients and minimal prep time!
The vibrant red white and blue colors of the graham crackers and marshmallows add a festive touch making this dish perfect for Memorial Day celebrations. Serve it warm with your favorite dippers for a deliciously nostalgic experience.
Ingredients
- 1 cup semi-sweet chocolate chips
- 1 cup mini marshmallows
- 1 tablespoon unsalted butter
- 1/4 cup heavy cream
- 8-10 regular graham crackers crushed
- 8-10 red and blue graham crackers for decoration
Instructions
- Preheat your oven to 350°F (175°C).
- In an oven-safe dish combine the semi-sweet chocolate chips and heavy cream. Stir in the butter.
- Bake for about 5-7 minutes until the chocolate is melted. Stir until smooth.
- Top with mini marshmallows and return to the oven for another 2-3 minutes or until the marshmallows are golden brown.
- Remove from the oven and serve warm with both regular and colored graham crackers for dipping.
Grilled Peach and Ice Cream Sundae
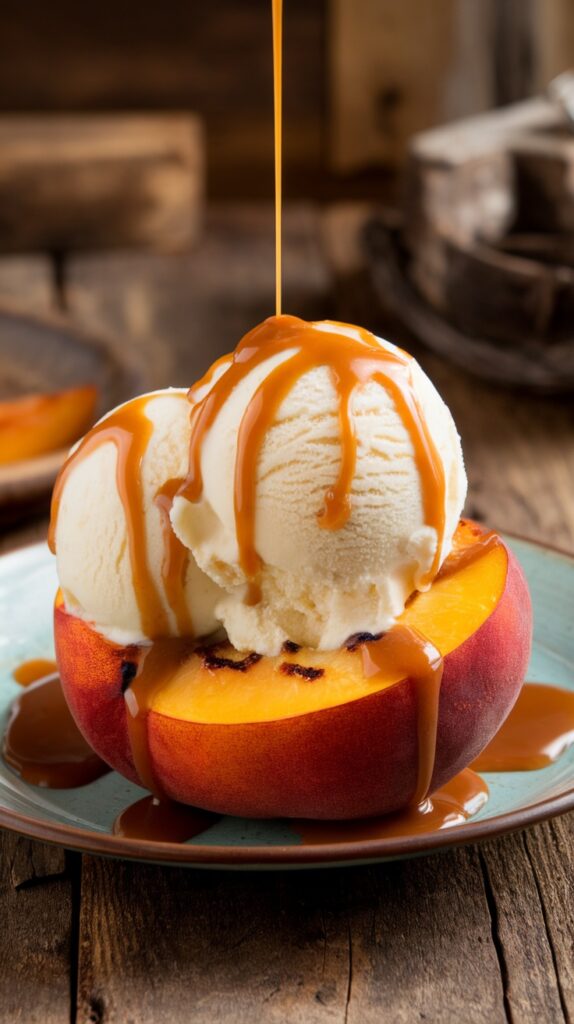
Grilled Peach and Ice Cream Sundae is a delightful treat that combines the juicy sweetness of grilled peaches with the creamy goodness of vanilla ice cream. The warm caramelized edges of the peaches enhance their natural flavor making each bite a delicious contrast to the cold ice cream. It’s a simple dessert that feels indulgent without requiring too much effort perfect for summer gatherings or Memorial Day celebrations.
This sundae is all about balancing flavors and textures. The smoky notes from grilling the peaches pair beautifully with a drizzle of caramel sauce and your favorite toppings. It’s a great way to impress your guests while keeping things easy and fun!
Ingredients
- 4 ripe peaches halved and pitted
- 2 tablespoons olive oil
- 1 teaspoon cinnamon
- 4 scoops vanilla ice cream
- 1/2 cup caramel sauce
- Chopped nuts (optional)
- Fresh mint leaves for garnish (optional)
Instructions
- Preheat your grill to medium heat.
- Brush the peach halves with olive oil and sprinkle with cinnamon.
- Place the peaches cut-side down on the grill. Grill for about 4-5 minutes or until they are tender and have nice grill marks.
- Remove the peaches from the grill and let them cool slightly.
- To serve place each grilled peach half in a bowl add a scoop of vanilla ice cream on top and drizzle generously with caramel sauce.
- If desired sprinkle with chopped nuts and garnish with mint leaves. Enjoy!
Red White and Blueberry Trifle
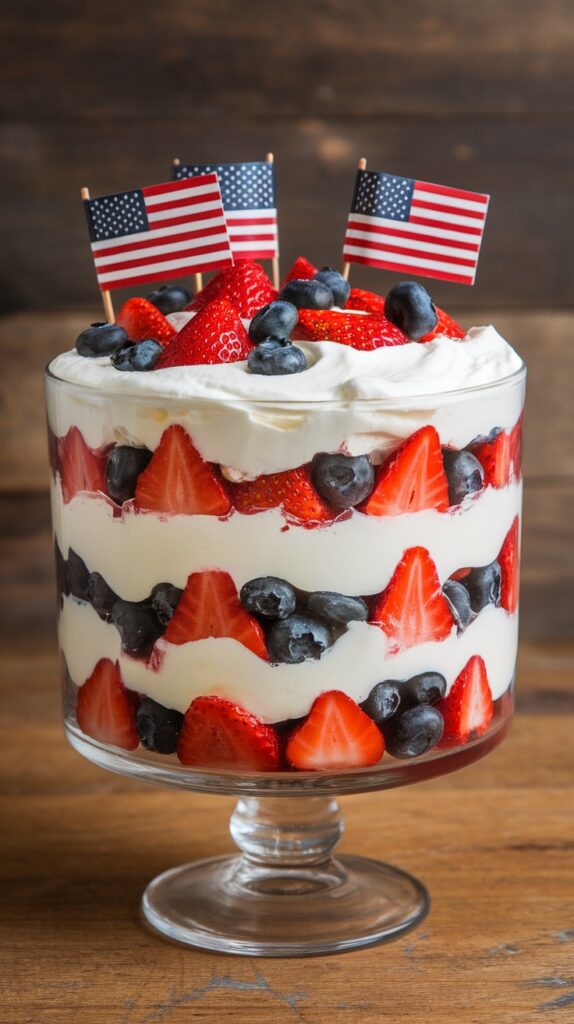
Celebrate Memorial Day with a delightful Red White and Blueberry Trifle that’s as tasty as it is festive. This dessert layers fresh strawberries blueberries and creamy vanilla pudding creating a colorful and refreshing treat that everyone will love. It’s simple to make and the layers give it a beautiful presentation making it perfect for gatherings.
The combination of sweet berries and smooth cream creates a delicious balance that’s sure to impress your guests. Plus it’s a no-bake dessert so you can whip it up in no time. Get ready to enjoy a lovely slice of summer with each spoonful!
Ingredients
- 2 cups strawberries sliced
- 2 cups blueberries
- 4 cups vanilla pudding (store-bought or homemade)
- 2 cups whipped cream (store-bought or homemade)
- 1 package of ladyfingers or sponge cake
- Fresh mint leaves for garnish (optional)
Instructions
- Prepare the Trifle Dish: Start by selecting a clear glass trifle dish or any large clear bowl to showcase the beautiful layers.
- Layer the Ladyfingers: Place a layer of ladyfingers or sponge cake at the bottom of the dish breaking them if needed to fit.
- Add Pudding: Spoon a layer of vanilla pudding over the ladyfingers smoothing it out evenly.
- Add Berries: Next add a layer of sliced strawberries and blueberries on top of the pudding.
- Repeat Layers: Continue layering the remaining ingredients in the same order until the dish is filled ending with a layer of whipped cream on top.
- Garnish: For a festive touch add a few whole berries and mint leaves on top of the whipped cream.
- Chill: Refrigerate the trifle for at least 1 hour before serving to allow the flavors to meld.
Chocolate Firecracker Cupcakes
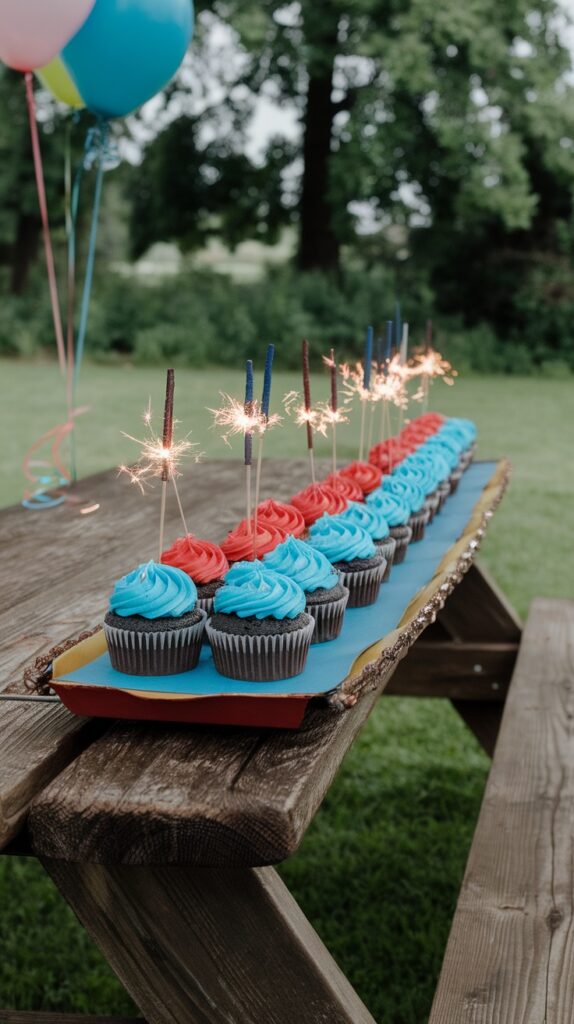
Chocolate Firecracker Cupcakes are a delightful treat perfect for summer celebrations. With their rich moist chocolate base and vibrant frosting these cupcakes are sure to be a hit at any Memorial Day gathering. They are not only tasty but also easy to whip up making them a great choice for bakers of all skill levels.
The combination of chocolate and colorful frosting topped with festive sparklers adds a fun twist that will impress both kids and adults alike. Whether you’re hosting a barbecue or just want to celebrate the holiday these cupcakes will brighten up the occasion!
Ingredients
- 1 3/4 cups all-purpose flour
- 1 3/4 cups granulated sugar
- 3/4 cup unsweetened cocoa powder
- 1 1/2 teaspoons baking powder
- 1 1/2 teaspoons baking soda
- 1 teaspoon salt
- 2 large eggs
- 1 cup whole milk
- 1/2 cup vegetable oil
- 2 teaspoons vanilla extract
- 1 cup boiling water
- 1 cup butter softened
- 4 cups powdered sugar
- 1/2 cup heavy cream
- Red and blue food coloring
- Sparklers for decoration
Instructions
- Preheat the Oven: Preheat your oven to 350°F (175°C) and line a cupcake pan with cupcake liners.
- Make the Batter: In a large mixing bowl combine flour sugar cocoa powder baking powder baking soda and salt. Add eggs milk vegetable oil and vanilla extract. Mix until smooth. Gradually stir in boiling water until well combined.
- Bake the Cupcakes: Fill each cupcake liner about 2/3 full with batter and bake for 18-20 minutes or until a toothpick inserted comes out clean. Allow to cool completely.
- Prepare the Frosting: In a bowl beat the softened butter until creamy. Gradually add powdered sugar and heavy cream mixing until fluffy. Divide the frosting into two bowls and color one red and the other blue.
- Frost the Cupcakes: Using a piping bag swirl red and blue frosting on each cooled cupcake creating a fun firecracker effect.
- Add Sparklers: Just before serving insert sparklers into the center of the cupcakes for a festive touch.
Star-Spangled Cookies
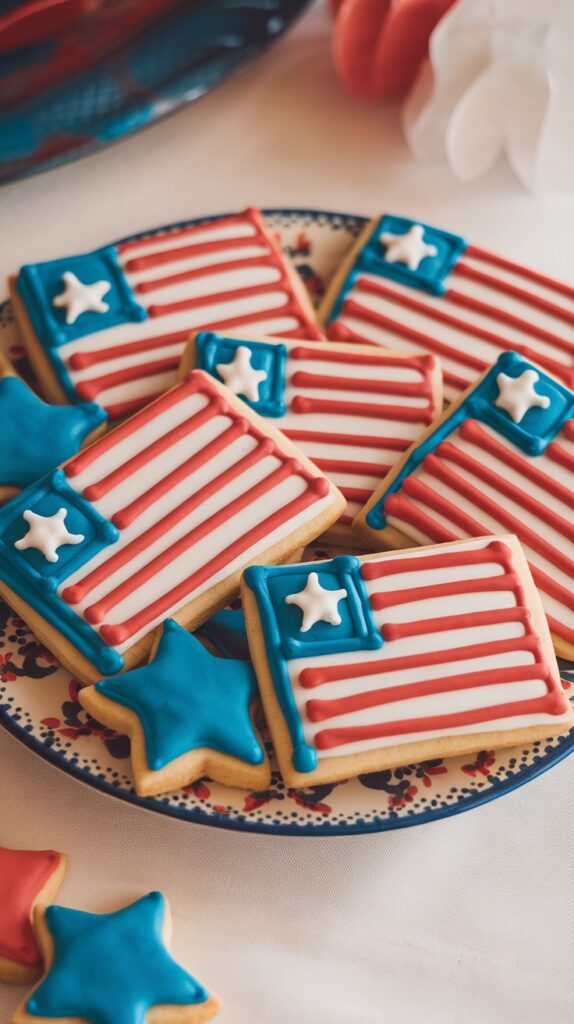
Star-Spangled Cookies are delightful treats that capture the spirit of Memorial Day with their colorful and festive designs. These sugar cookies are not just visually appealing; they offer a sweet vanilla flavor that pairs perfectly with the vibrant icing. Whether you’re an experienced baker or just starting out this recipe is simple and a great way to get everyone involved in the kitchen.
These cookies are perfect for any Memorial Day gathering. Kids will love helping to decorate and everyone will enjoy munching on these fun treats while celebrating. You can easily change the decorations to suit different occasions but for Memorial Day the red white and blue theme is just right. Let’s dive into the recipe!
Ingredients
- 2 ¾ cups all-purpose flour
- 1 teaspoon baking powder
- ¼ teaspoon salt
- 1 cup unsalted butter softened
- 1 ½ cups granulated sugar
- 1 large egg
- 1 teaspoon vanilla extract
- Red and blue food coloring
- Royal icing (for decoration)
- Star-shaped and flag-shaped cookie cutters
Instructions
- Preheat your oven to 350°F (175°C). In a bowl whisk together flour baking powder and salt; set aside.
- In a large mixing bowl cream together softened butter and sugar until light and fluffy. Beat in the egg and vanilla extract until well combined.
- Gradually add the dry ingredients to the butter mixture mixing until a dough forms. Divide the dough in half and wrap each half in plastic wrap. Chill in the refrigerator for at least 1 hour.
- Once chilled roll out the dough on a floured surface to about ¼ inch thick. Use your cookie cutters to create star and flag shapes then place them on a baking sheet lined with parchment paper.
- Bake for 8-10 minutes or until the edges are lightly golden. Allow to cool completely on a wire rack.
- While the cookies cool prepare your royal icing and divide it into bowls. Tint some icing red some blue and leave some plain white. Decorate the cookies to resemble flags and stars allowing icing to set.
Frozen Yogurt Bark with Fruits
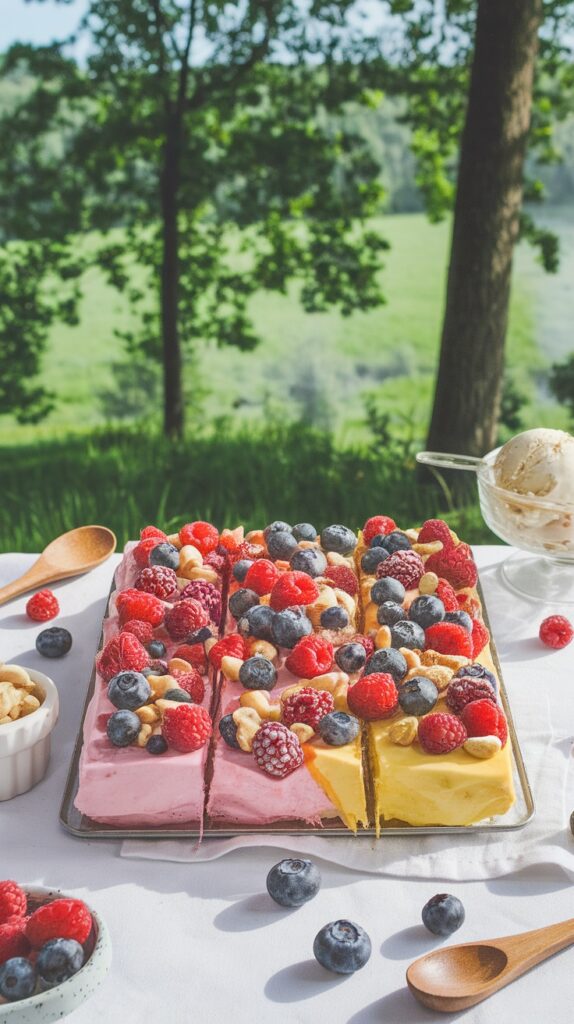
Frozen yogurt bark is a delightful and refreshing treat especially perfect for warm weather gatherings like Memorial Day. It combines the creamy goodness of yogurt with a colorful array of fruits offering a light and satisfying dessert that’s easy to make. The balance of tangy yogurt and sweet fruits makes each bite a burst of flavor.
This recipe is not only simple but also customizable allowing you to swap in your favorite fruits or nuts. It’s a fun way to enjoy a healthier dessert option that everyone will love!
Ingredients
- 2 cups plain Greek yogurt
- 1/4 cup honey or maple syrup
- 1 teaspoon vanilla extract
- 1 cup mixed fresh berries (strawberries blueberries raspberries etc.)
- 1/4 cup chopped nuts (almonds walnuts or cashews)
Instructions
- Prepare the Yogurt Mixture: In a mixing bowl combine the Greek yogurt honey and vanilla extract. Stir until well mixed.
- Spread the Yogurt: Line a baking sheet with parchment paper and pour the yogurt mixture onto it. Spread it out evenly making a rectangular or square shape about 1/2 inch thick.
- Add Toppings: Scatter the mixed berries and chopped nuts over the yogurt base. Press them gently into the yogurt.
- Freeze: Place the baking sheet in the freezer for about 3-4 hours or until the yogurt is completely frozen.
- Cut and Serve: Once frozen remove the yogurt bark from the baking sheet and break it into pieces. Enjoy immediately or store in an airtight container in the freezer.
Red Velvet Cake Pops

Red velvet cake pops are a delightful treat that combines the rich flavor of red velvet cake with the fun portable form of a cake pop. Dipped in chocolate and decorated with sprinkles these bites are not only tasty but also visually appealing making them perfect for any Memorial Day celebration. The combination of moist cake and creamy frosting creates a sweet experience that everyone will enjoy.
Making red velvet cake pops is surprisingly straightforward. After baking the cake and crumbling it you’ll mix in frosting to form balls that are easy to handle. Once they’re chilled a dip in chocolate and a sprinkle of fun decorations bring them to life. These pops are an enjoyable way to celebrate the holiday with friends and family!
Ingredients
- 1 box red velvet cake mix
- 3 large eggs
- 1 cup vegetable oil
- 1 cup water
- 1 can cream cheese frosting
- 12 ounces chocolate melts (red white and blue)
- Sprinkles (red white and blue)
- Lollipop sticks
Instructions
- Prepare the Cake: Preheat your oven according to the box instructions. Mix together the cake mix eggs oil and water. Bake in a greased cake pan until a toothpick comes out clean. Allow to cool completely.
- Crumble the Cake: Once the cake is cool crumble it into a large bowl. Add the cream cheese frosting and mix until fully combined.
- Shape the Pops: Roll the cake mixture into small balls about 1 inch in diameter. Place them on a baking sheet lined with parchment paper. Chill for at least an hour.
- Dip and Decorate: Melt the chocolate melts in a microwave or double boiler. Dip the end of each lollipop stick into the melted chocolate and insert it into the cake ball. Then dip the entire cake pop into the chocolate allowing excess to drip off. Immediately sprinkle with colored sprinkles.
- Let Set: Place the finished cake pops upright in a foam block or stand until the chocolate hardens. Enjoy your festive red velvet cake pops!